
Inserting & Formatting Shapes
Open Publisher includes a library of over 200 vector shapes built entirely from mathematical SVG paths. Unlike raster images, these shapes are infinitely scalable – they remain perfectly crisp at any zoom level, any document size, and in any PDF or print output. Shapes support full colour fills, borders, shadows, glows, opacity, 3D rotation, and custom point editing.
The SVG Shape Library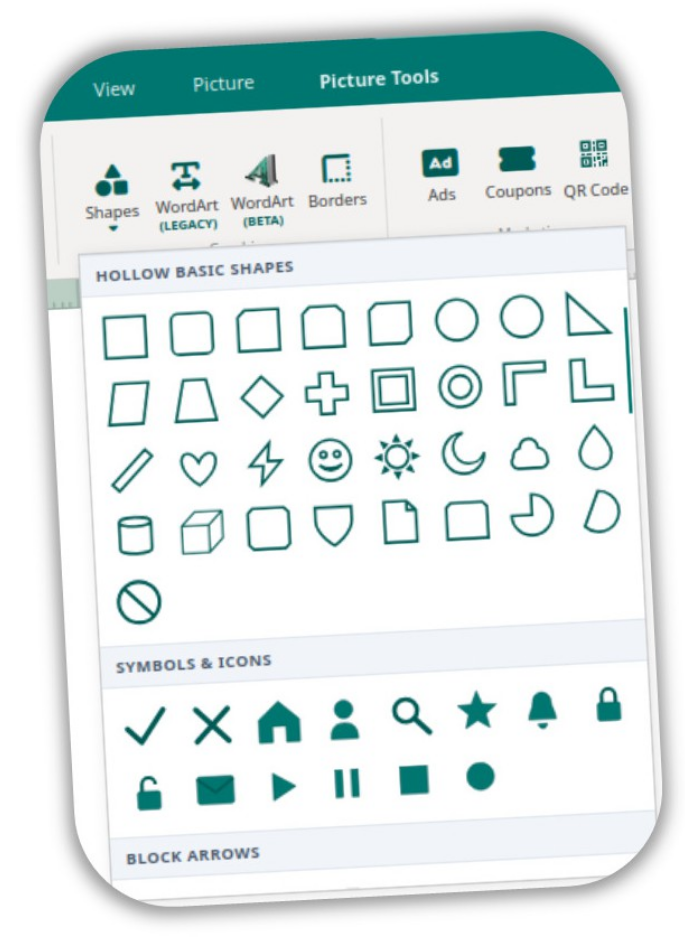
To insert a shape:
-
Go to the Insert ribbon tab and click the Shape drop-down arrow.
-
Browse the categorised gallery and click a shape to insert it at a default size on the canvas.
-
Resize and position it as needed.
Shapes are grouped by category:
-
Basic Geometry – Rectangle, Ellipse, Triangle, Diamond, Pentagon, Hexagon, Octagon, Parallelogram
-
Arrows & Lines – Single arrow, Double arrow, Curved arrow, Hollow arrows (Flat stop, Diamond head)
-
Callouts & Speech – Rectangular callout, Cloud callout, Oval callout, Thought bubble
-
Stars & Bursts – 4-point, 5-point, 6-point, 8-point, 12-point, 16-point, 24-point, 32-point stars, Sunburst
-
Hearts & Shields – Heart, Shield, Cross, Fleur-de-lis
-
Banners & Ribbons – Horizontal banner, Diagonal ribbon, Curved banner
-
Flow & Process – Process box, Decision diamond, Cylinder, Database
-
Frames & Borders – Rounded rectangle, Snip corners, Diagonal corner
Tip: For the fastest access to a shape’s formatting options, simply double-click any vector shape on the canvas. The Format Properties dialog opens immediately without requiring navigation through the ribbon.
Shape Fill: Solid Colour & No Fill
 With a shape selected, use the Shape Fill button in the Drawing Tools ribbon (the paint bucket icon with a colour swatch) to apply a solid fill colour. Clicking it opens the colour picker.
To make a shape hollow (transparent interior with only a border visible), open the Format Properties dialog and select the No Fill (Transparent) option.
Shape Fill: Gradient Fills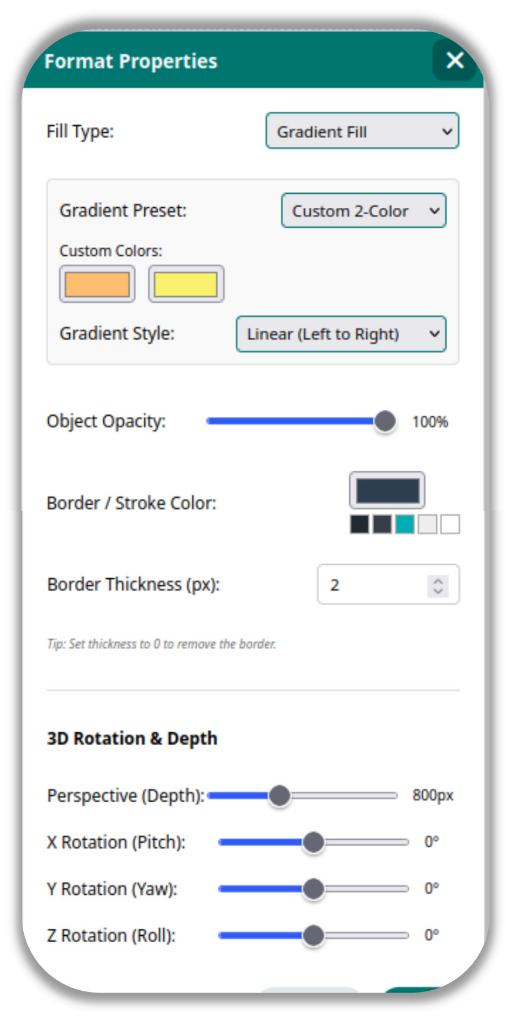
Open Publisher ships with a suite of pre-calculated gradient presets and a custom two-colour tool. To apply a gradient:
-
Double-click the shape to open Format Properties.
-
Choose Gradient from the Fill dropdown.
-
Select a preset or use the custom two-colour tool.
-
Choose a direction: Linear, Diagonal, or Radial.
-
Click OK.
Available gradient presets include:
-
Gold, Chrome, Bronze, Silver – Metallic reflective gradients.
-
Sunset – Warm orange-to-pink blend.
-
Ocean – Cool blue-to-teal blend.
Gradients are applied as native SVG <linearGradient> or <radialGradient> definitions, meaning they scale perfectly and are fully print-safe.
Shape Fill: Textured Patterns
Eight distinct texture styles can be applied to any vector shape or text box from the Format Properties dialog: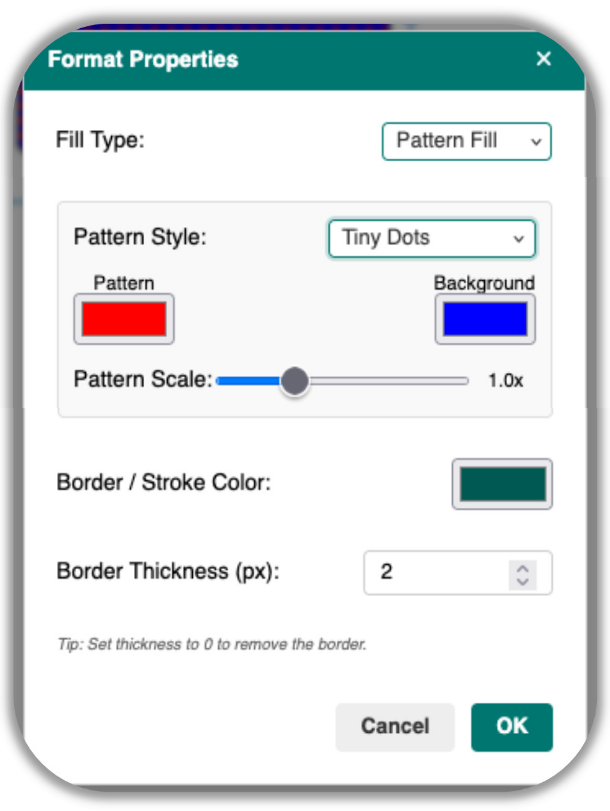
-
Tiny Dots – Fine, dense dot matrix.
-
Polka Dots – Large, evenly spaced circles.
-
Diagonal Lines – 45° hatching lines.
-
Vertical Lines – Straight vertical striping.
-
Horizontal Lines – Straight horizontal striping.
-
Crosshatch – Overlapping diagonal lines forming a grid.
-
Checkerboard – High-contrast alternating squares.
-
Square Grid – Uniform grid overlay.
A Pattern Scale slider in the Format Properties dialog lets you scale textures from 20% (very fine and dense) up to 300% (very large and bold). Textures are rendered as native SVG <pattern> definitions, ensuring they remain infinitely sharp at any zoom level.
Object Transparency (Opacity)
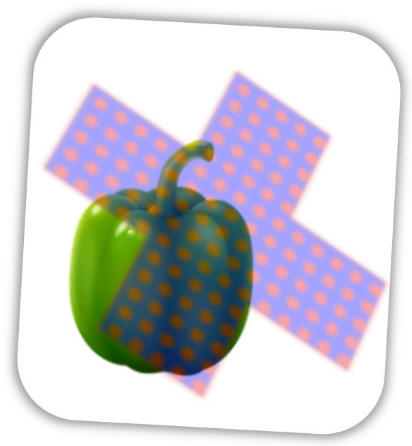
The Format Properties dialog includes an Opacity slider that controls the transparency of the entire object – from fully opaque (100%) down to completely invisible (0%). This applies universally to the whole element, including its fill, borders, and any pattern or gradient applied.
This is ideal for creating semi-opaque overlay effects, letting underlying images, text, and page backgrounds softly show through your design elements.
Note: When you click OK, the transparency is automatically “baked” into the element as a PNG image, ensuring overlays render flawlessly in PDF exports and print output without layering artefacts.